First project
Build a drilled plate step by step, change it, then export it.
Build an 80 × 50 × 20 mm plate with two holes and rounded corners. No account needed.
Made a mistake? Ctrl/Cmd+Z undoes the last action.
Create the project
On the home page, click Open Atelier. You land in My projects.
Click New project (or Create a project if the list is empty).
Type “Drilled plate” in Project name, then click Create project.
The editor opens in Modeling, on an empty canvas. The project is saved automatically in this browser.
Draw the rectangle
Click Create a sketch, in the center of the canvas, under “Everything starts with a sketch.”
In Choose a sketch plane, on the right, click Top.
Press R (Rectangle). Click the origin, where the axes cross.
Move the pointer up and to the right. Without clicking, type 80, Tab, 50, then Enter.
Click Finish, the green button in the sketch bar.
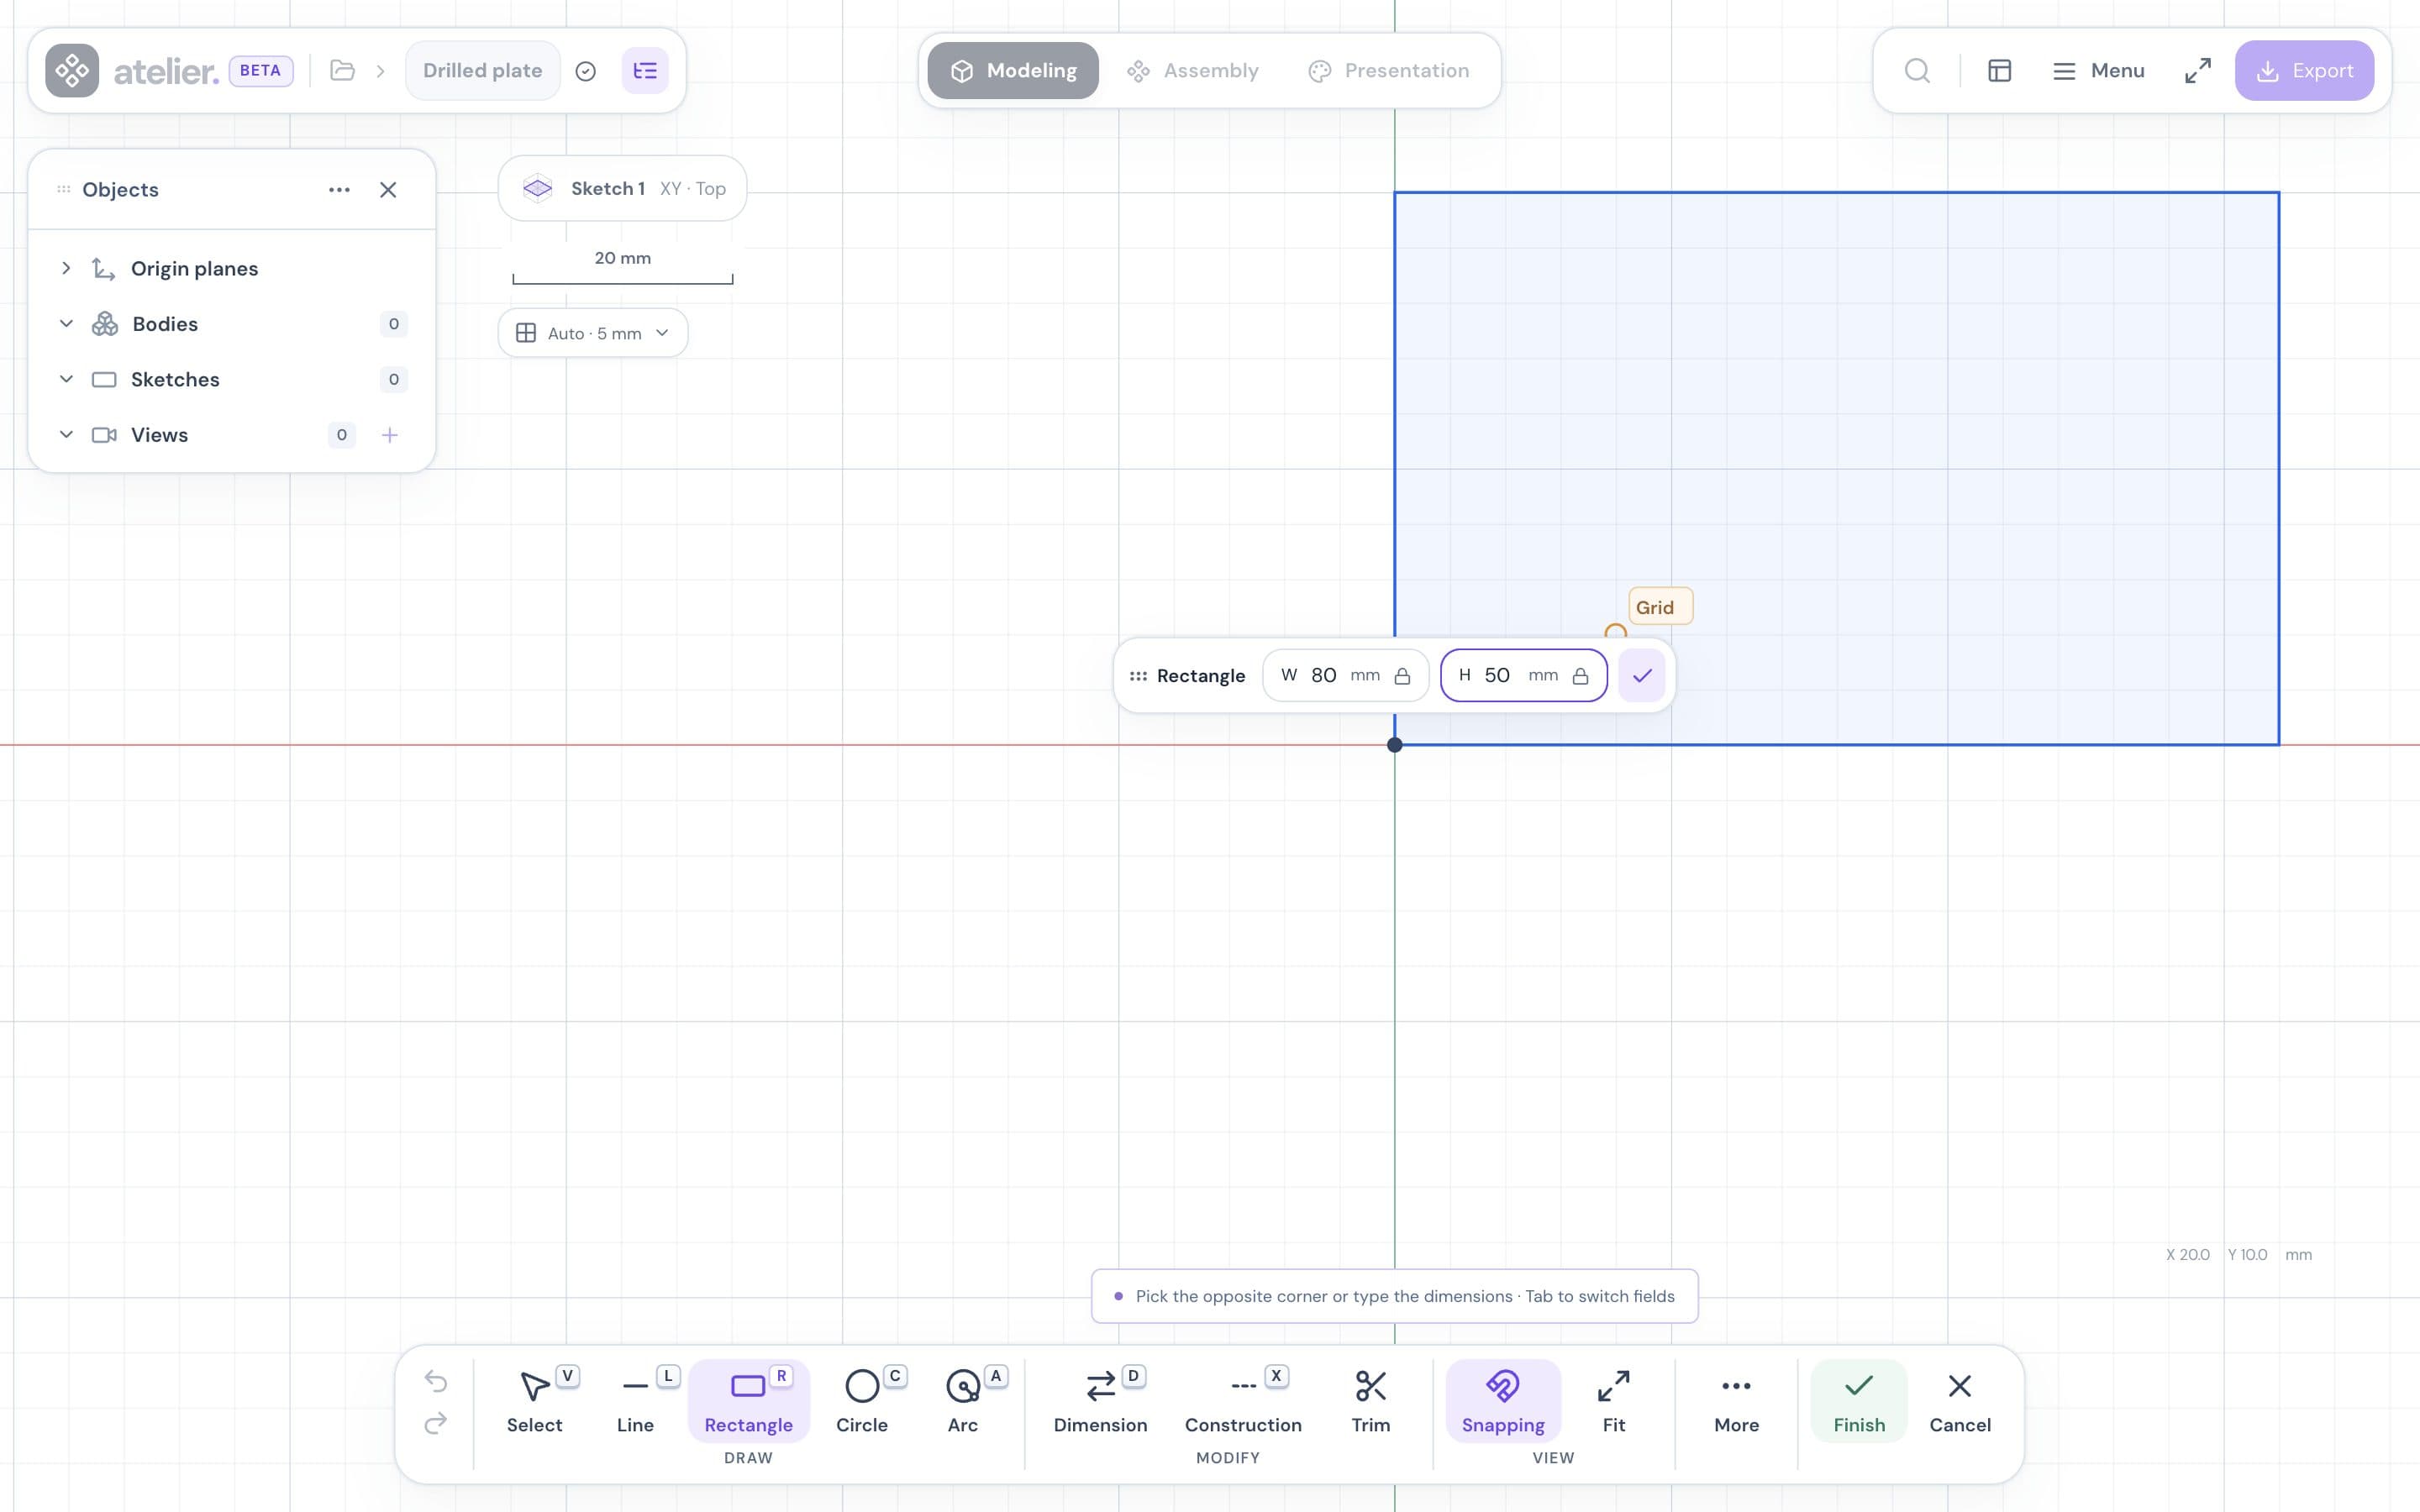
The values you type become dimensions you can change later.
Careful: the Cancel cross, next to Finish, discards the whole sketch.
Add volume
The sketch is still selected. Press E, or right-click its profile and choose Extrude.
The Extrude quick settings open. Type 20, then Enter.
The plate appears in the Objects panel as Body 1. You can also drag the arrow instead of typing the height.
Drill two holes
Double-click the top face (Faces mode). A sketch opens on that face.
Press C (Circle). Click on the left to place the center, type 6, then Enter.
Draw a second 6 circle on the right. Click Finish.
Press E, choose Cut, then check Through all.
Click the Apply check mark.
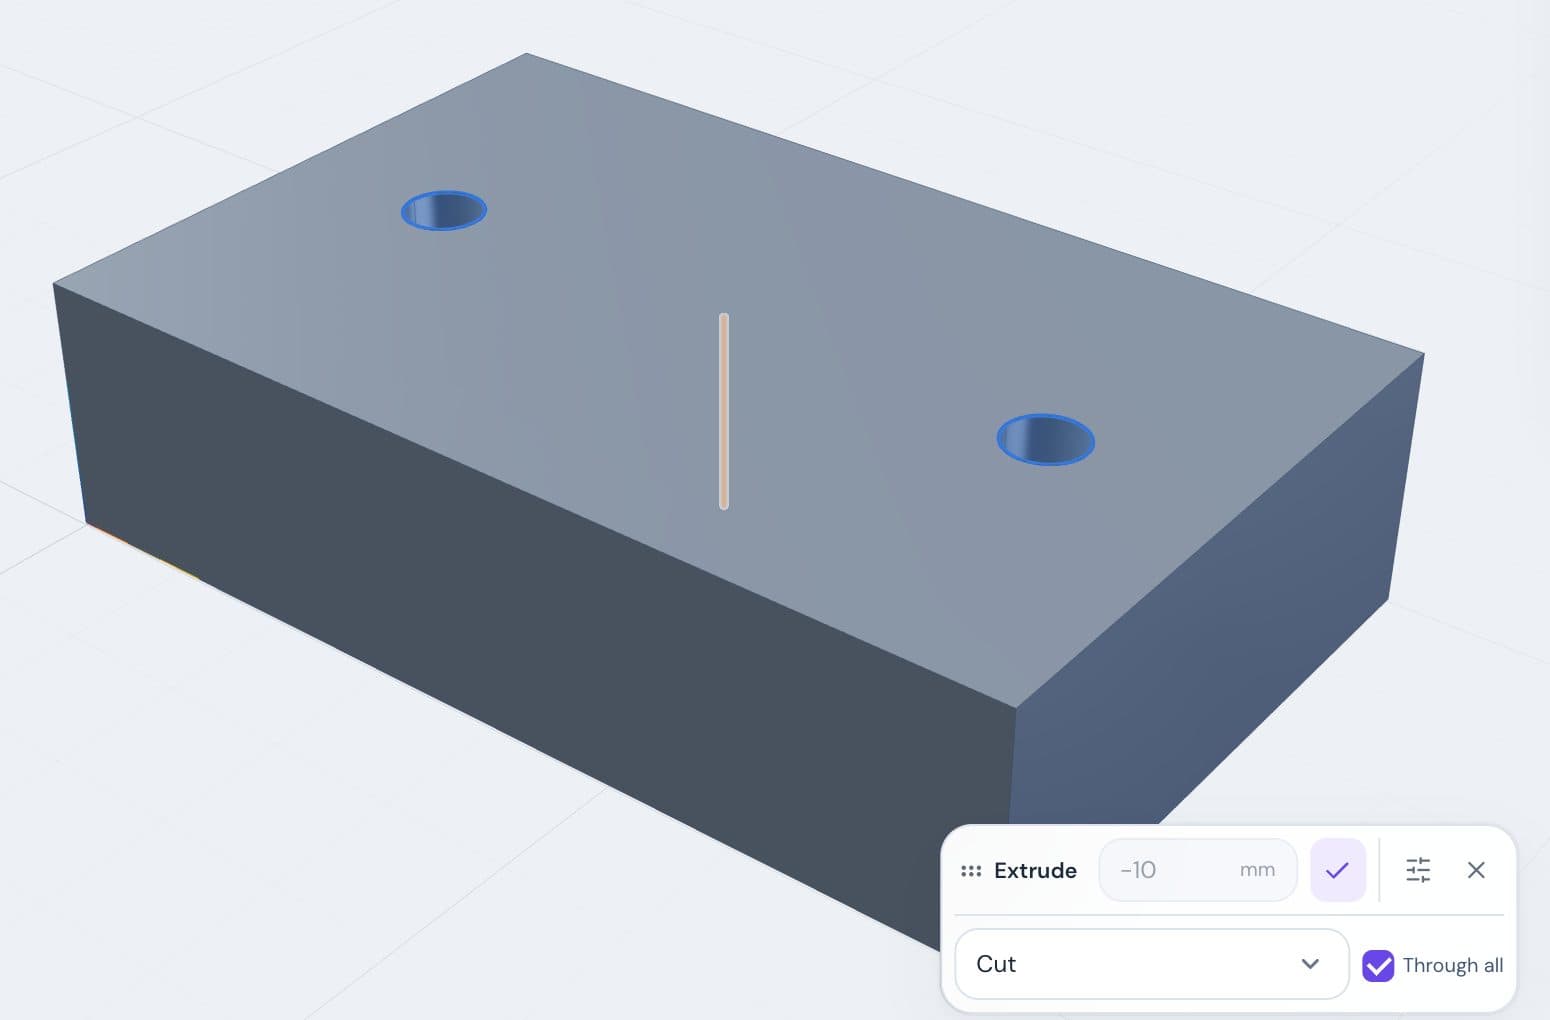
To place the centers at an exact position, see Constraints and dimensions.
Round the corners
Press 3 to select Edges.
Click a vertical edge of the plate.
Hold Shift and click the other three vertical edges.
Press F (Fillet). Type 3, then Enter.
To see the hidden edges, orbit the view: drag on the part, not on empty space.
Change a dimension
The part remembers every step. Change a value and everything after it is recomputed.
The fillet radius
Click Operations at the right edge of the canvas: the panel starts closed.
Double-click step 3, Fillet.
Replace 3 with 5, then press Enter.
The hole diameter
In Objects → Sketches, double-click Sketch 2.
Click a Ø 6 dimension, type 8, then Enter. Do the same for the other circle.
Click Finish. Both holes are now 8 mm.
Export
Click Export, at the top right.
Keep the STEP format, then click Export. The file Drilled plate.step downloads.
STEP keeps the exact geometry. For 3D printing, choose STL or 3MF. With nothing selected, all visible bodies are exported.
What’s next
Sketches
All the drawing tools.
Constraints and dimensions
Lock shapes and sizes.
Operations
Extrude, fillet, shell, hole…
History
Go back to a step.
Parameters
Drive dimensions with named values.
Import and export
All the file formats.
To find your way around the editor, see Interface tour and Keyboard shortcuts.