Appearance and rendering
Choose materials, set the lighting and background, then capture an image of the model.
The Appearance panel adjusts your model’s look from a part studio or an assembly. These settings never change the geometry.
Open the Appearance panel
Click Appearance in the dock. The panel offers:
| Tool | What it’s for |
|---|---|
| Materials | Choose the look of each body |
| Studio | Set the lighting |
| Background | Choose the background color |
The Materials, Studio and Background tabs share the panel. Document tools and assembled placements stay unchanged.
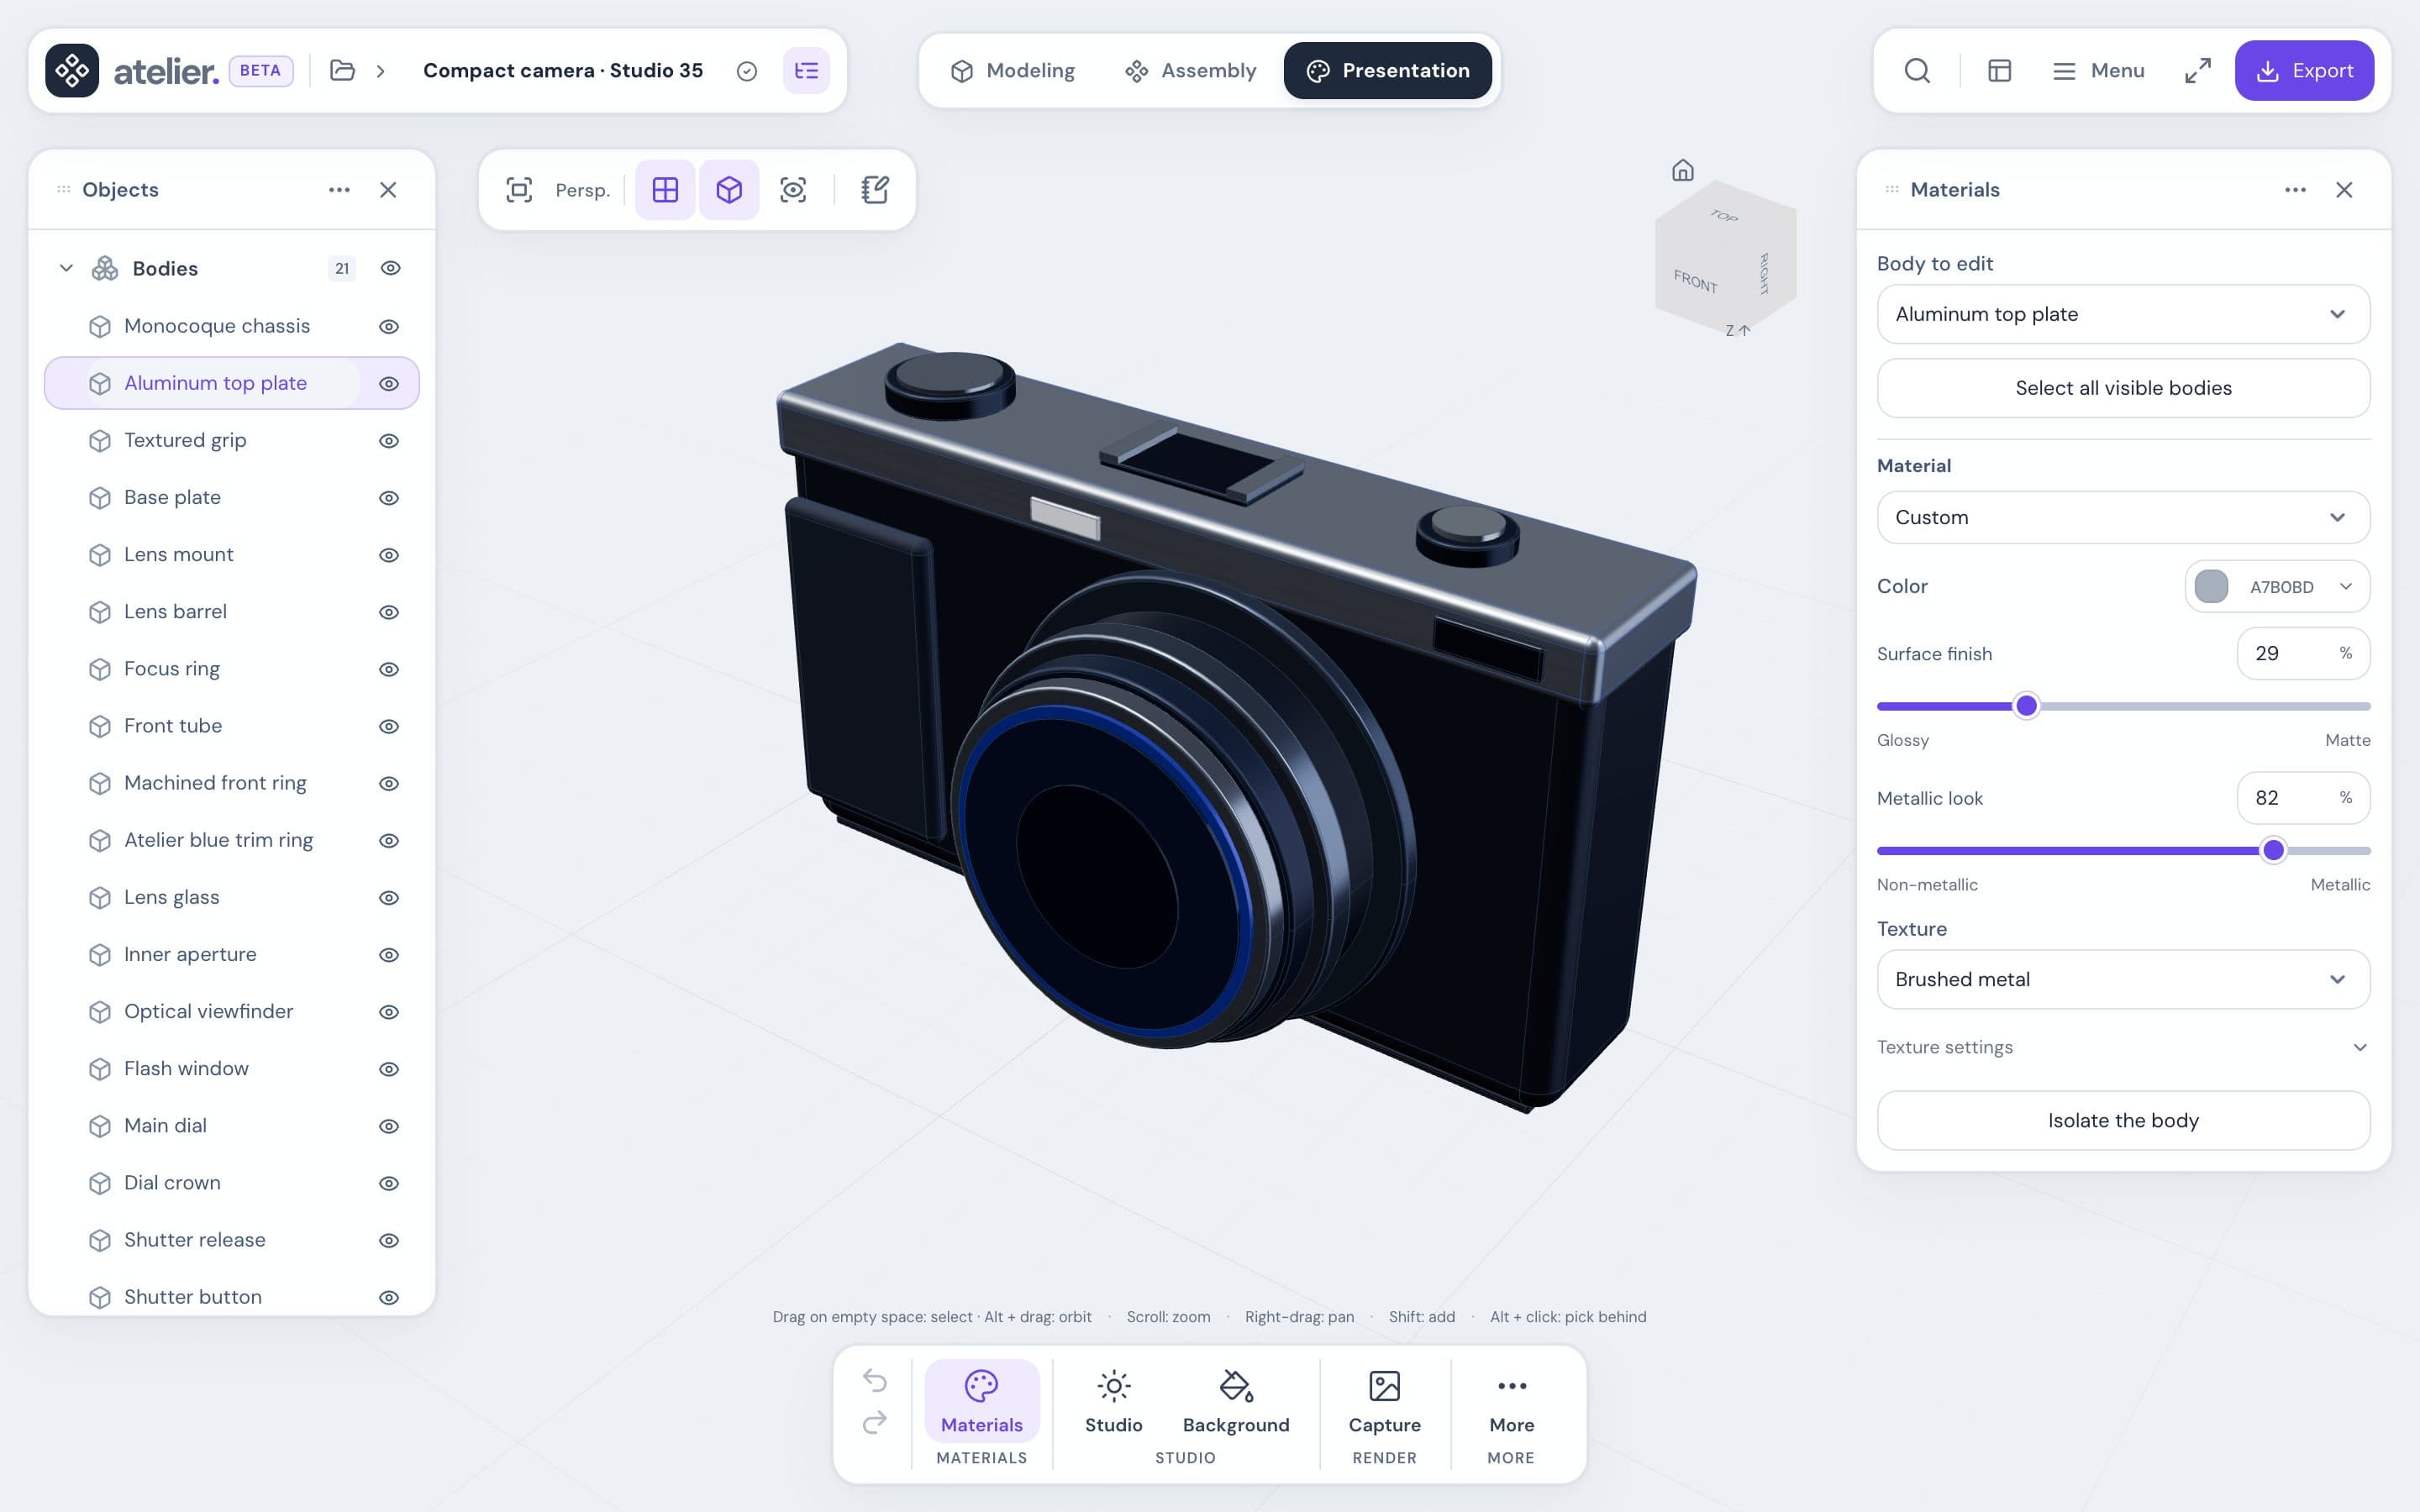
Change a body’s material
Click Materials.
Choose the body in Body to edit, or click it in the view.
Choose a material from the Material list: Aluminum, Copper, Natural oak…
Fine-tune it if needed with the settings below.
| Setting | Effect |
|---|---|
| Color | Opens the color picker. Default restores the original look. |
| Surface finish | From Glossy to Matte |
| Metallic look | From Non-metallic to Metallic |
| Texture | Plain, Wood grain, Brushed metal, or Fine grain |
With a texture, Texture settings sets its size, orientation, and contrast.
Good to know:
- A material covers the whole body, never a single face. Faces an imported STEP colors keep their color over it: Face colors shows them, and Remove gives these faces the body color (Restore brings them back).
- Choosing a material also replaces the texture.
- Ctrl/Cmd+Z undoes each change.
- In Modeling, Body material (Properties panel) offers the same list and the color.
Several bodies at once
Click Select all visible bodies, or add bodies with Shift+click. Then choose a material in Apply a material…. The color and the other settings are set body by body.
Set the lighting
Click Studio. Choose an Ambience: Soft, Warm, or High contrast. Fine-tune with Light intensity, Light direction, and Image brightness.
Reset lighting restores the original settings.
Choose the background
Click Background, then choose a color in Studio background. Default follows the interface’s light or dark theme.
The lighting and background are saved in the project. They also apply in Modeling and Assembly.
Make bodies transparent
X-ray and Transparency… are explained in Selection and measurements. They aren’t saved in the project, but they do appear in the captured image.
Capture an image
Frame the model, or click a saved view in Views, beside the view cube (see Interface tour).
Open Export from the project menu, then choose PNG.
Choose the Image resolution. Check Transparent background or Include edges if needed.
Click Download PNG.
The image shows the visible bodies on the studio background. The grid, selection, sketches, and annotations are left out.
- Fit the model automatically is checked by default. Uncheck it to keep your own framing.
- Include edges requires the Edges button in the view bar to be on.
- For a single body, first click Isolate the body in the Materials section.
What exports keep
| Format | Appearance kept |
|---|---|
| 3MF | The color, and that of faces colored by an imported STEP |
| glTF, GLB | The color, surface finish, and metallic look, and the colors of faces |
| STEP | The color of each body and of its colored faces |
| STL | None |
Textures, lighting, and background are kept only in the PNG image and the .atelier file. See also Import and export.